从零开始的机器学习实践指南
作者:admin · 2026-01-05 · 阅读时间:9分钟
本文面向刚接触人工智能开发的初级程序员,通过一个完整的图像分类案例,手把手教你使用Python构建第一个AI模型。我们将使用Keras框架和MNIST手写数字数据集,全程包含可运行的代码示例。本文不仅涵盖基础实现,还会深入关键概念的解释,并提供优化与部署的实用技巧,助力你从入门到实战。
一、环境准备与工具介绍
1.1 为什么选择Python和Keras?
Python因其简洁的语法和丰富的库支持,成为AI开发的首选语言。Keras作为TensorFlow的高级API,具有以下优势:
- 易用性:简化了神经网络构建过程,适合快速原型设计。
- 模块化设计:通过“层”(Layer)的概念组合复杂模型。
- 社区支持:拥有大量文档和开源项目参考。
1.2 工具包安装与功能说明
# 基础数据处理

import numpy as np  # 高性能数组运算

import pandas as pd  # 数据表格处理(虽然本例未使用,但在其他场景常用)

import matplotlib.pyplot as plt  # 数据可视化


# 机器学习框架

from tensorflow import keras  # 模型构建与训练

from tensorflow.keras import layers  # 神经网络层组件


# 数据集

from tensorflow.keras.datasets import mnist  # 经典手写数字数据集
安装依赖的命令:
pip install tensorflow matplotlib numpy pandas1.3 开发环境配置建议
- Jupyter Notebook:适合交互式调试,可实时查看数据和模型输出。
- GPU加速:若使用NVIDIA显卡,安装CUDA和cuDNN可显著提升训练速度。
- Python版本:推荐3.8+,避免兼容性问题。
二、数据处理:机器学习的基础
2.1 数据集加载与探索
MNIST数据集包含60,000张训练图像和10,000张测试图像,每张为28×28像素的手写数字灰度图。加载数据后,建议先了解数据分布:
# 加载数据集

(train_images, train_labels), (test_images, test_labels) = mnist.load_data()


# 输出基本信息

print(f"训练集维度: {train_images.shape}")  # (60000, 28, 28)

print(f"标签类别数: {len(np.unique(train_labels))}")  # 10(0-9)
2.2 数据预处理的必要性
原始像素值范围为0-255,直接输入模型会导致数值不稳定,归一化(Normalization)是关键步骤:
# 将像素值缩放到0-1之间

train_images = train_images.astype("float32") / 255

test_images = test_images.astype("float32") / 255


# 添加通道维度(CNN要求输入形状为[高度, 宽度, 通道数])

train_images = np.expand_dims(train_images, -1)  # 形状变为(60000, 28, 28, 1)

test_images = np.expand_dims(test_images, -1)


# 标签转换为One-Hot编码

num_classes = 10

train_labels = keras.utils.to_categorical(train_labels, num_classes)

test_labels = keras.utils.to_categorical(test_labels, num_classes)
2.3 数据可视化:理解输入特征
通过可视化样本,检查数据质量并直观理解模型的学习目标:
plt.figure(figsize=(10,5))
for i in range(15):
plt.subplot(3,5,i+1)
plt.imshow(train_images[i].squeeze(), cmap='gray') # 移除通道维度显示图像
plt.title(f"Label: {np.argmax(train_labels[i])}")
plt.axis('off')
plt.tight_layout()
plt.show()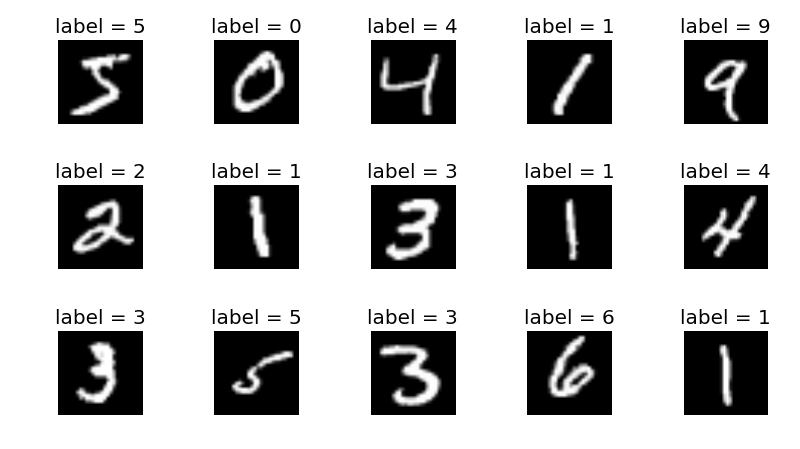 三、构建神经网络模型
3.1 卷积神经网络(CNN)的设计原理
CNN通过局部感知和权值共享高效处理图像数据,核心组件包括:
- 卷积层(Conv2D):提取局部特征(如边缘、纹理)。
- 池化层(MaxPooling2D):降低空间维度,增强模型鲁棒性。
- 全连接层(Dense):将特征映射到类别概率。
3.2 模型架构实现
model = keras.Sequential(

    [

        layers.Input(shape=(28, 28, 1)),

        # 第一卷积块:32个3x3卷积核,ReLU激活

        layers.Conv2D(32, kernel_size=(3, 3), activation="relu"),

        layers.MaxPooling2D(pool_size=(2, 2)),  # 输出形状变为(13, 13, 32)

        # 第二卷积块:64个3x3卷积核

        layers.Conv2D(64, kernel_size=(3, 3), activation="relu"),

        layers.MaxPooling2D(pool_size=(2, 2)),  # 输出形状(5, 5, 64)

        # 全连接层

        layers.Flatten(),  # 将3D特征展平为1D向量(5*5*64=1600)

        layers.Dropout(0.5),  # 随机丢弃50%神经元,防止过拟合

        layers.Dense(num_classes, activation="softmax")  # 输出10个类别的概率

    ]

)


model.summary()  # 打印模型结构
模型结构输出示例:
Total params: 34,826

Trainable params: 34,826

Non-trainable params: 0
3.3 模型编译:配置学习过程
model.compile(

    loss="categorical_crossentropy",  # 多分类交叉熵损失函数

    optimizer="adam",  # 自适应学习率优化器

    metrics=["accuracy"]  # 监控准确率

)
四、模型训练与评估
4.1 训练过程参数解析
batch_size = 128  # 每次迭代使用的样本数

epochs = 15  # 遍历整个训练集的次数


history = model.fit(

    train_images,

    train_labels,

    batch_size=batch_size,

    epochs=epochs,

    validation_split=0.1  # 10%训练数据作为验证集

)- Batch Size:影响内存使用和训练速度,较小的值适合小显存GPU。
- Epochs:需平衡训练时间与模型性能,避免过拟合。
4.2 训练过程可视化
# 绘制训练曲线

plt.figure(figsize=(12, 5))


# 准确率曲线

plt.subplot(1, 2, 1)

plt.plot(history.history['accuracy'], label='Training Accuracy')

plt.plot(history.history['val_accuracy'], label='Validation Accuracy')

plt.title('Accuracy Evolution')

plt.xlabel('Epoch')

plt.ylabel('Accuracy')

plt.legend()


# 损失曲线

plt.subplot(1, 2, 2)

plt.plot(history.history['loss'], label='Training Loss')

plt.plot(history.history['val_loss'], label='Validation Loss')

plt.title('Loss Evolution')

plt.xlabel('Epoch')

plt.ylabel('Loss')

plt.legend()


plt.tight_layout()

plt.show()
4.3 模型评估与过拟合判断
score = model.evaluate(test_images, test_labels, verbose=0)

print("测试集损失:", score[0])  # 理想值应接近验证损失

print("测试集准确率:", score[1]) # 高于98%表明模型表现优秀- 过拟合迹象:若训练准确率远高于验证准确率,需增加Dropout或数据增强。
五、模型应用与部署
5.1 单样本预测实现
def predict_sample(model, image):

    img = image.astype("float32") / 255

    img = np.expand_dims(img, axis=0)  # 添加批次维度

    img = np.expand_dims(img, axis=-1)  # 添加通道维度

    prediction = model.predict(img)

    return np.argmax(prediction)


# 随机测试样本预测

sample_index = np.random.randint(0, len(test_images))

plt.imshow(test_images[sample_index].squeeze(), cmap='gray')

plt.title(f"预测: {predict_sample(model, test_images[sample_index])}\n真实: {np.argmax(test_labels[sample_index])}")

plt.axis('off')

plt.show()
5.2 模型保存与加载
# 保存完整模型(包括结构和权重)

model.save("mnist_cnn.h5")


# 加载模型进行推理

loaded_model = keras.models.load_model("mnist_cnn.h5")
5.3 使用Flask部署API服务
from flask import Flask, request, jsonify

import numpy as np

from PIL import Image

import io


app = Flask(__name__)

model = keras.models.load_model("mnist_cnn.h5")


@app.route('/predict', methods=['POST'])

def predict():

    # 接收上传的图像文件

    file = request.files['image']

    img = Image.open(io.BytesIO(file.read())).convert('L')  # 转为灰度图

    img = img.resize((28, 28))  # 调整尺寸


    # 预处理

    img_array = np.array(img) / 255.0

    img_array = np.expand_dims(img_array, axis=(0, -1))  # 添加批次和通道维度


    # 预测并返回结果

    prediction = model.predict(img_array)

    return jsonify({'prediction': int(np.argmax(prediction))})


if __name__ == '__main__':

app.run(host='0.0.0.0', port=5000)测试API:
curl -X POST -F "image=@test_image.png" http://localhost:5000/predict

# 预期返回:{"prediction": 7}
六、模型优化与进阶学习
6.1 性能优化技巧
- 数据增强:通过旋转、平移、缩放生成更多训练样本。
from keras.preprocessing.image import ImageDataGenerator

datagen = ImageDataGenerator(rotation_range=10, zoom_range=0.1)

model.fit(datagen.flow(train_images, train_labels, batch_size=32))- 超参数调优:使用Keras Tuner自动搜索最佳学习率、层数等。
- 迁移学习:复用预训练模型(如VGG16)的特征提取层。
6.2 常见问题解答(FAQ)
- Q:训练时损失值不下降?
- 检查学习率是否过小,尝试增大
learning_rate。 - 确认输入数据是否已正确归一化。
- Q:模型预测结果全为同一类别?
- 可能是类别不平衡问题,检查数据分布。
- 尝试初始化不同的随机种子。
6.3 推荐学习路径
- 基础巩固:学习线性代数、概率论基础。
- 框架进阶:掌握TensorFlow的底层API和自定义训练循环。
- 项目实战:参加Kaggle竞赛(如Digit Recognizer)。
- 扩展应用:探索自然语言处理(NLP)或强化学习。
总结
通过本教程,你已掌握了使用Python和Keras开发AI模型的完整流程。从数据预处理到模型部署,每个环节都至关重要。建议在实际项目中尝试调整模型结构(如增加LSTM处理时序数据),或探索更复杂的应用场景(如目标检测)。记住,持续实践和参与开源社区是提升技能的最佳途径。
热门推荐
一个账号试用1000+ API
助力AI无缝链接物理世界 · 无需多次注册
3000+提示词助力AI大模型
和专业工程师共享工作效率翻倍的秘密